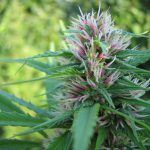
Sea of Green, a very efficient marijuana cultivation technique
El Sea of Green, o SoG, es una técnica de cultivo holandesa que acelera el proceso de cultivo. En un tiempo de 2 a 3 meses se puede conseguir una muy buena cosecha. Esto implica que se optimiza el tiempo, ya que podemos cosechar continuamente todo el año y hacer varios cultivos durante ese periodo para compensar que las plantas son más pequeñas que en exterior. Sí, ese es el primer cambio que nota un cultivador que pasa de exterior a interior, hay que poner muchas más plantas pequeñas para hacer como una grande en exterior. Por suerte hay técnicas de cultivo avanzado de marihuana que pueden hacer que la cosecha aumente bastante, este es el caso de el Sea of Green, o SoG.
¿Qué es el Sea of Green?
El SoG (Sea of Green) es un sistema de cultivo intensivo en horizontal, muy sencillo, que consiste en crear una especie de alfombra o toldo verde, uniforme y homogénea. Para lograrlo, las plantas se colocan una al lado de la otra y se inducen a florecer rápidamente para que no crezcan mucho en altura. Se recomienda utilizar esquejes para que las plantas sean lo más homogéneas posible. El objetivo es ocupar todo el espacio disponible con esquejes del mismo tamaño, maximizando así el efecto de la luz.
En condiciones óptimas, es posible obtener, sin ser un gran experto, hasta un 20% más de gramos por planta. Este método no solo optimiza el espacio y la luz, sino que también facilita la gestión del cultivo y puede resultar en cosechas abundantes y uniformes.
What are the advantages of Sea of Green?
The main advantages of the SoG cultivation method are:
- Requires very little space
- Optimizes the use of light
- Exceptionally shortens times
- Robust, massive and very resinous central buds
- No time for pests to do harm
By having many small plants together, SoG is an ideal technique for small spaces. It is also very beneficial for large growers who need a large and constant production volume.
Sea of Green can be performed with all types of substrates, and offers excellent results in both soil and coco. However, in hydroponic or aeroponic systems, growth is especially fast. This versatility and efficiency make SoG a popular technique among growers of all levels and sizes of operation.
How to make Sea of Green (SoG)?
In 6 steps it is possible to have a Sea of Green system. You will see how easy it is.
1- Setting up the growing space
The first step to make a Sea of Green is to measure the available space to know how many pots you will be able to fit. Normally 20 sativas or 25 indicas can fit per square meter with the intensive SoG growing technique. Does it seem like a lot? Don’t worry, we all thought it was a lot at the beginning. It is ideal for this technique that makes you invest a little more in plants at the beginning but it has an impact on the speed of cultivation and above all, higher production.
Lighting is a determining factor in this technique, so you must make sure you have a powerful light that covers the entire cultivation area. It is normal to use sodium lamps. To give you an idea, a 250W lamp will cover 0.5 m2, and a 400W lamp will cover 1m2.
Another important issue is watering. As in the Sea of Green we work with a large number of plants, and they are all piled up, the best thing to do is to install automatic irrigation that drips at the same rhythm in each pot. In this way you will avoid the most tedious part of this technique but, above all, you will ensure that all the plants are in exactly the same conditions. This is only recommended for crops grown in substrates other than soil, as soil does not respond well to automatic watering. You can use automatic irrigation in the rest of substrates.
2- Make cuttings and select the best ones.
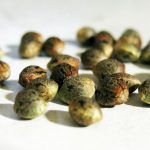
Although it is possible to make a Sea of Green with seeds, this will waste a precious amount of time. It is usual to use this technique with cuttings. Moreover, being a system based on homogeneity, cuttings allow you to have many plants with exactly the same genetics that will grow at a very similar rate, otherwise, some plants will overshadow others. The ideal is to use cuttings of the same variety and if possible, from the same mother. It is also recommended to make more cuttings than necessary to be able to select the most similar ones. You can also start from seeds, but it is not advisable because you lose time (and it is more expensive).
What you should never do is to mix different varieties, because if they have different heights, leafiness or flowering periods the SoG will lose its effectiveness.

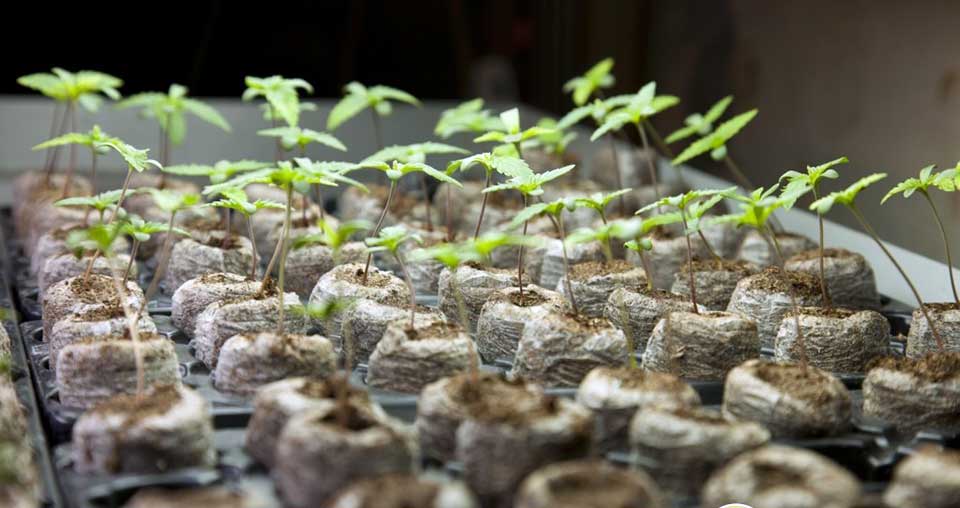
3- Planting and caring for cuttings
When your cuttings have been prepared, the first thing to do is to feed them with Root juice fertilizer so that they take advantage of all the space available in the pot as soon as possible. These stimulants should be applied up to the second week of flowering.
The substrate should be 50 to 70% dry, and you should also induce cycles of dryness and humidity to stimulate root growth.
It is important to transplant the plants to better control their size and growth rate, which is essential for an effective Sea of Green. You will start with small pots of 0.25 L (9x9x8), and later move them to larger pots of 3 to 5 L, depending on the substrate you have chosen.
4- Growing the plants
The growing period in Sea of Green is kept to a minimum, with the objective of inducing flowering as soon as possible. Indicas require 10 days of growth, while sativas need 14 days.
During these first two weeks, you should set the light bulb very low to prevent the plants from stretching too much. Controlling the temperature also helps manage growth. Adjust the light cycle to 18/6 to ensure the plants grow well. Rotating the plants around is recommended so they all receive equal light exposure, with the smallest ones ideally placed in the center.
Watering at this stage is every 2 days and it is necessary to add additives, such as growth fertilizer, root stimulant and growth stimulant. Start adding these products little by little, usually a little less than what the manufacturer says.
5- Put the plants to bloom
When the plants have reached 25 – 30 cm, they should be put into bloom. The process is so fast because when making a Sea of Green we do not want the plants at any time exceed 50 cm in height. For them to flower we must change the light cycle and set it to 12/12. When you change the light cycle, the plants enter a pre-flowering vegetative growth stage in which they prepare to flower. This stage can take up to 3 weeks.
It is important to note that if you are growing sativas, you will need to initiate the flowering phase earlier because they continue to grow significantly even during bloom. In fact, if you have decided to do a Sea of Green with sativas, it is recommended to start the flowering phase as soon as they develop their first leaves. If you are using seeds instead of cuttings, the ideal approach is to keep them in a 12/12 light cycle from the beginning.
During the flowering stage of the plants we will make two prunings. The first one as soon as they start the 12/12 cycle, and again between the second and third week of flowering, which is when they finish growing. You should cut some branches but never the top ones so as not to delay the growth, besides it will mean that we have wasted time letting them grow too much.
You should prune the lower branches because, with the plants being so close together, the light will not penetrate, and their buds will not develop. This also prevents the central buds from absorbing all the available energy. Pruning the lower branches has many advantages: it allows better air circulation, you can save these cuttings for the next harvest, and, most importantly, the hormones will concentrate in the tips, promoting more growth.
Keep in mind that the goal is to have, in addition to the central bud, only 2 to 4 other branches. The rest should be removed. Only the top 5 nodes should remain.
In the irrigation you will have to add fertilizers, stimulants and flowering boosters. It is better if they are organic so that they will not leave traces in the taste or smell.
In this final stage, the pots that we will need will be of 3,25 L (15x15x18) if you use coco substrate, and of 5 L (18x18x25,5) for soil. Do not crowd them too much, it is better to leave about 15 cm between each plant.
6- Preparing for harvest
This step is the easiest and most exciting. The seedlings are almost ready to be cut. They require almost no work, except for two details. On the one hand, you will have to do a final flush to clean the soil and roots and remove any traces of fertilizers. And on the other hand, if the buds are too heavy, you should help them not to fall, either with sticks that act as guides, or with a net. And enjoy!
Technical data:
- Temperature: it should be between 22º and 28º, and should not have variations of more than 4 degrees.
- Humidity: maintain between 40 and 60%.
- PH: it will depend on the substrate you use. The recommended values for the growth stage are 6.0 for soil and 5.8 for coco. For flowering it should be between 6.3 and 6.5 if the substrate is soil, and if it is coco, between 6.0 and 6.2.
Which marijuana strains are best for a Sea of Green?
Although SoG can be done with almost all varieties, the smaller the plant, the better the result. For an efficient Sea of Green, the plants should not measure more than 50 cm at the end of the cycle due to light penetration, which is why SoG is ideal for indicas but not so much for sativas. It is necessary to look for varieties which develop a large apical flower and branch very little. Some marijuana strains that do very well for SoG are Super Critical Auto Marijuana, Super Bud Seeds, Exodus Cheese Seeds, Great White Shark marijuana, Northern Lights X marijuana, among others. As you can see, the range is very wide. Of course, if you prefer sativas, you’d better opt for another method, such as SCRoG.
Images taken from Sensi Seeds and Philosopher Seeds.
Video by ManualCultivo.
Founder of Experiencia Natural, creative and entrepreneur, designer, master in grower and marketing. For a normalization of all plants and substances, giving priority to patients and users.